Shop tips: flat fix (replacing the tube)
By Patrick Loftus, Service Manager
Being able to fix your own flat will save you time, money, and frustration. To replace a tube, you will need a tire lever, a pump, and, if you don’t have a quick release wheel, you will need a wrench to get your wheel off.
Step 1: remove the wheel
 If it’s a rear wheel, shift the gears to the smallest cog in the back (the one right next to the frame) and take note of how the chain wraps around the cogs and derailleur. If in doubt, take a picture before you remove the wheel. This will make wheel removal and reinstallation much easier. For many bikes you’ll need to release the brake. There are too many types of brakes out there to cover specifics, but look for a quick cable release at the brake, or a flip lever on the brake caliper or lever. You shouldn’t have to unbolt the cable. If you’re unsure about how to do this safely, consult your friendly bike mechanic.
Step 2: remove the tire
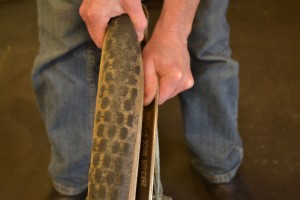 Once the wheel is off the bike, release as much air as possible from the tube. Make sure that the tire bead (the part of the tire that contacts the rim) is unhooked from the rim (if it is, the tire will flop around a little, but probably not fall off). Use a tire lever to get under one side of the tire. Slide the lever around the tire to release it from the rim. With one side off, you can usually pull the rest of tire off by hand. If not, use the tire lever and repeat step 3.
Step 3: find the cause of the flat
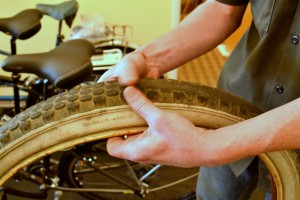 Keep the tube in the tire and put air in it. Slowly pull the tube out of the tire and listen for a hiss. When you find the hiss, check that part of the tire to find what caused the puncture and remove it. This might not be the only thing in the tire, so continue inspecting the tire by looking at the outside and running your fingers on the inside. Your hands should follow your eyes and be careful for sharp things! If your tire has a lot of small cuts in it, pinch those and try to remove any bits of glass or gravel. Some repeat flats are caused by such small debris stuck in the tire that you won’t feel it, so look closely. Also inspect the bead for any tears and look at the inside of the rim to make sure the rim strip/tape is still intact.
Step 4: replace the tube
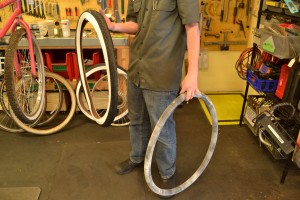 Once you’re sure you’ve removed all debris, grab a new tube. Check the side wall of the tire to see what size you need. At the Community Cycling Center we coat every tube with a special tire talc powder (any talc will do). This isn’t necessary, but will make reinstallation easier. Put enough air in the tube to give it shape, but not so much that it will stretch, then put the tube in the tire. Line the valve up with either the label or psi rating on the tire. Keeping that alignment consistent will help you find debris on future flat fixes.
Step 5: replace the tire
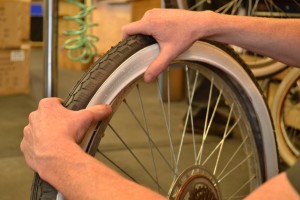 Put the tire back on in the reverse order you took it off. Start at the valve and put one side of the bead over the rim. Tuck the tube all the way into the tire, then try to mount the other side of the bead. I like to start and end 90 degrees from the valve so it doesn’t get in my way. The last bit of tire is always the toughest. Ideally you’ll manage this without a tire lever. If you can’t get it on with your bare hands try this:
Put the wheel at your feet with the last stubborn bit of tire on the ground. Pinch the top part of the tire and force it as deep into the rim as possible. Continue pulling the rest of the tire down toward the stubborn spot. This might just give you enough slack to get the rest of the tire on. See what this looks like.
If that doesn’t work, try the lever. Put the lever under the tire and hooked over the rim. Flip it until it’s perpendicular to the rim and slide the tire off. Flipping the lever past perpendicular point could damage the tube.
Step 6: inflate the tube
Inflate the tube to about 20psi and give one final inspection of the bead. Make sure that the tire is sitting in the rim evenly. Inflate the rest of the way. (This information is also on the side of the tire.)
Step 7: replace the wheel
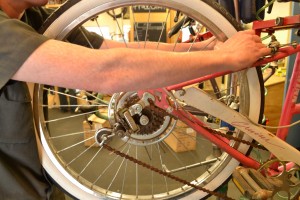 Reinstall the wheel to the bike and secure it properly. If it’s the rear wheel, put the chain back on the way it was (this is when that picture might be handy). For either wheel, remember to reattach any brake cable release. Any time you work on your brakes or wheels always give the brake levers a good hard squeeze before you ride to make sure they engage.
You’re ready to ride! Next tip we’ll cover how patch that tube you just swapped out. If you have any questions or want a more hands on lesson stop by our shop and speak to one of our friendly mechanics.
Previous tips: