Shop tip: tire inflation, valve types, and picking the right tube
By Patrick Loftus, Service Manager
This seems like a simple subject, but it’s one of the more common questions we get in our bike shop and it’s surprisingly complicated. Today’s shop tip will introduce all things tire related: casing, tread, valve types, decoding all those numbers on the side of the tire, picking the right tube, and, finally, inflating your tires.
Tire casing and tread: Bike tires are made of a woven fabric casing that’s coated in rubber for durability and traction. A denser weave means a higher quality, more puncture resistant tire that will handle a higher pressure. Some tires are further reinforced with a special layer to reduce punctures. These tires will cost a bit more initially, but prevent enough punctures to pay for themselves over the life of the tire. We carry basic tires starting at $12-$20, depending on size, with puncture resistant tires starting at $30, again, depending on size.
Tire tread is the rubber part that makes contact with the ground. Tire traction is all about surface area contact to the ground. Knobby mountain bike tires are great when riding off road because they can dig into the dirt, maximizing the contact area. On pavement those same knobs can’t dig into anything and provide very little contact with the ground. For city riding a slick tire is a better bet. You’ll have more tire contact with the pavement, giving you better traction. When it comes to anything metal in the road, wet weather, or leaves, traction can be compromised. Ride with caution.
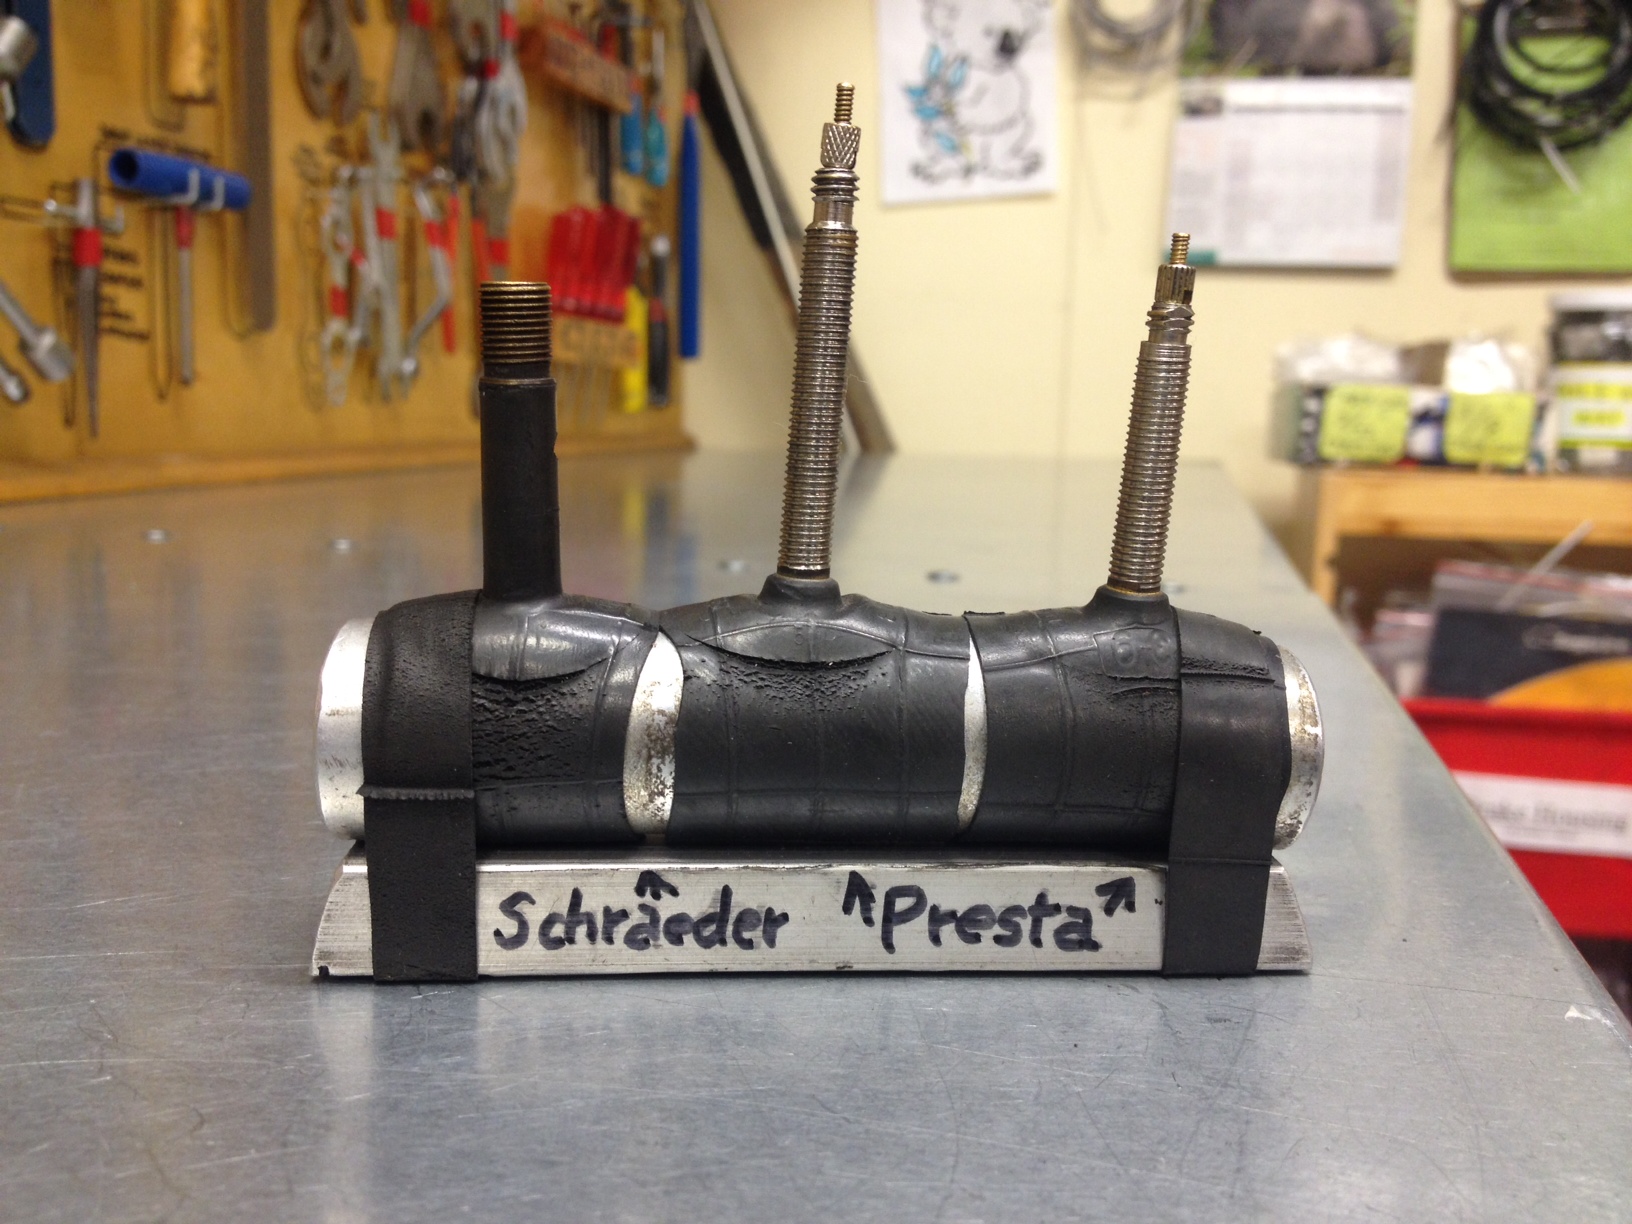
Valve Types: In this country we typically see two types of valves, presta and Schrader.
 Presta valves are the skinny metal valves commonly found on road racing bikes. In recent years they have become more common on higher quality bikes of all types. The big advantages of presta valves are how quickly they can inflate/deflate a tire, they screw closed making them less likely to leak, and they’re thinner, allowing for narrower rims on road racing bikes. You’ll find presta valves in various lengths for different rim depths.
- Schrader valveslook like a car valve. They were traditionally found on bikes with wider tires, such as beach cruiser, mountain bikes, etc. The biggest advantage to Schrader valves is ease of finding a pump or compressor that can inflate them. We carry adapters that will let you use a Schrader pump on a presta valve.These valves have different diameters, as do the valve holes drilled in the rims they are used on. While you can adapt the rim to go from one type to the other, it’s best to stick with the valve the rim was drilled for.
- There’s a third type of valve, the Wood’s valve, which is common in Europe, but rarely seen in the US. Wood’s valves are hard to use with American pumps. Luckily, they are the same diameter as a Schrader valve, so swapping tubes is pretty easy.
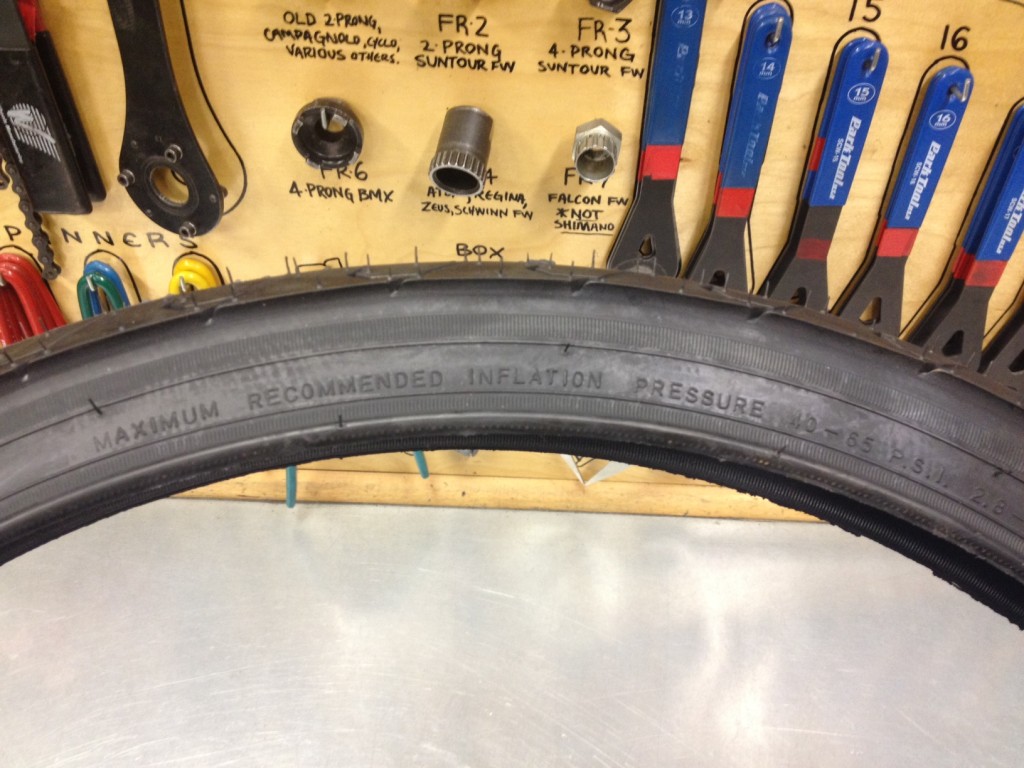
Decoding all those numbers: If you look closely at the side wall of the tire you’re likely to find a few sets of numbers embossed in the rubber, but what do they mean?
- Recommended minimum and maximum tire pressure: Skinny, road racing tires, such as a 700x23c tires, might range from 90-130psi, while wider tires might have a range of 35-65psi. You might also see the pressure notated as “BAR” or “KPa”, as different countries use different measurements.
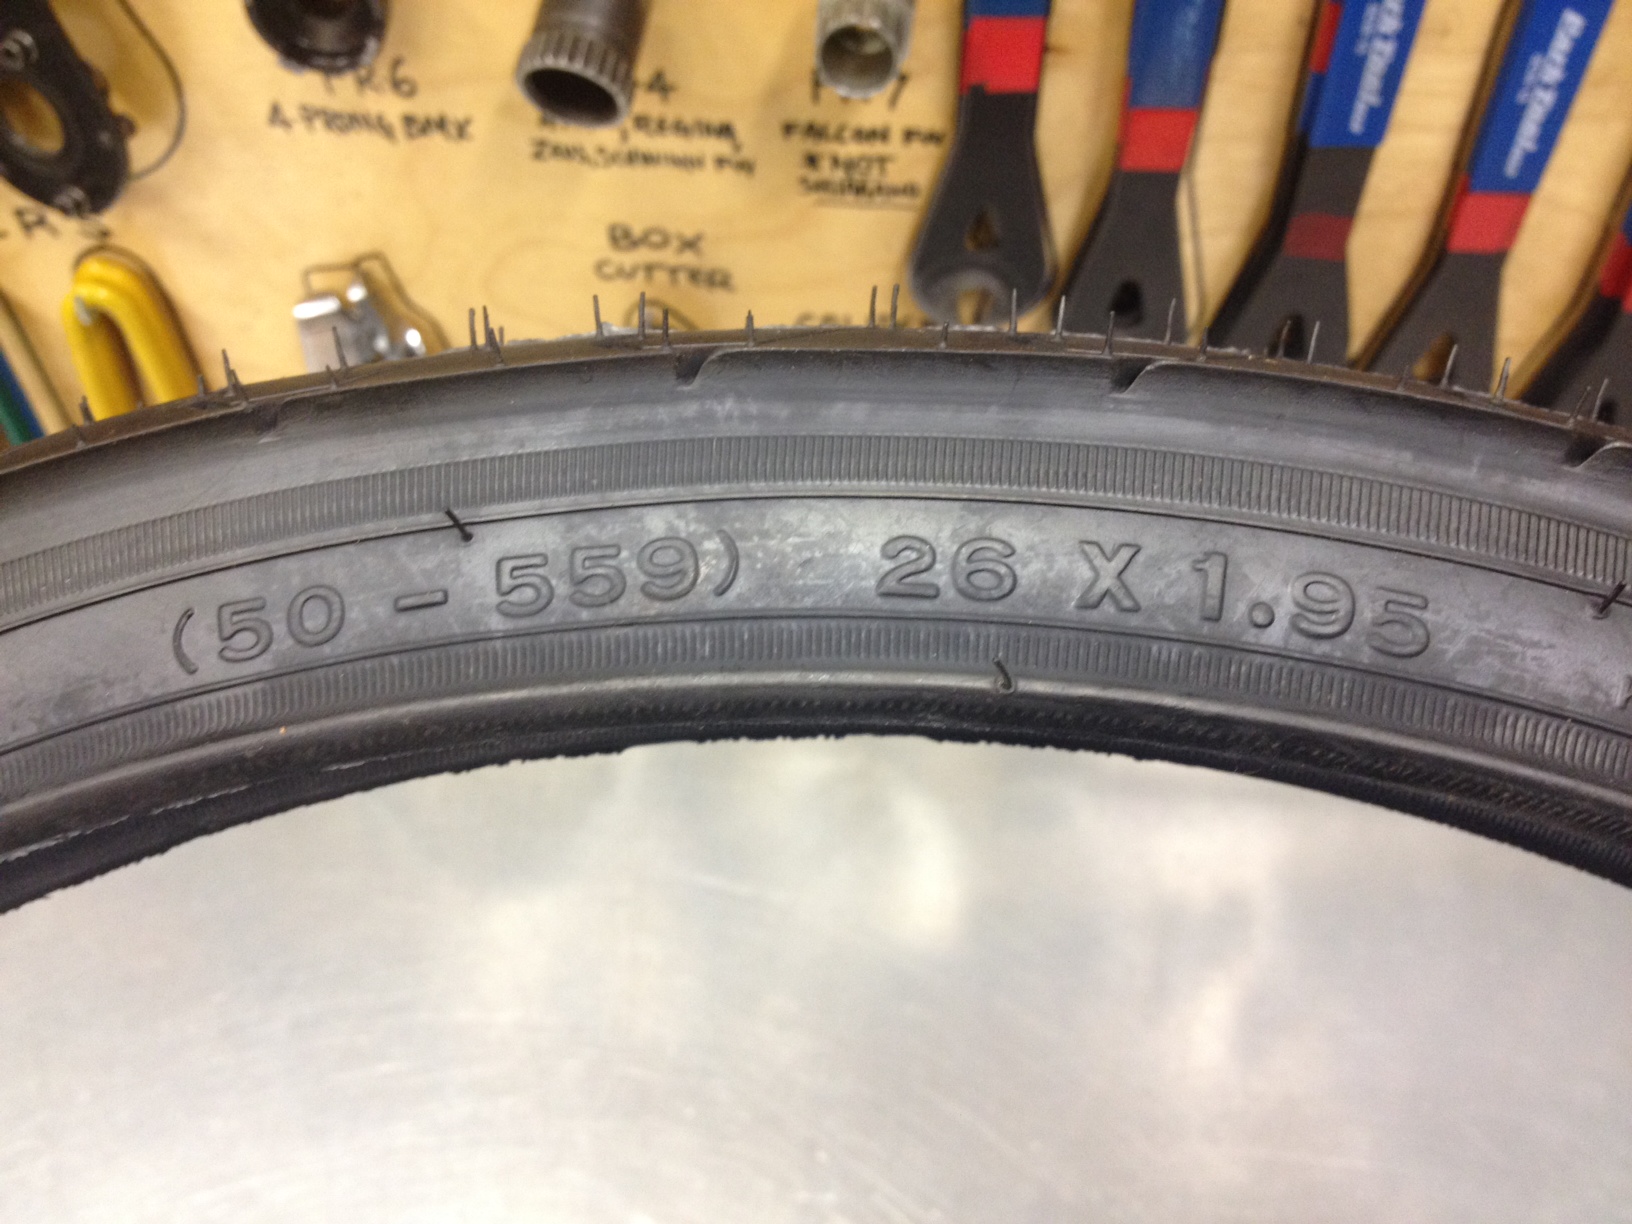
- Tire size: Two or more sets of numbers will relate to tire size. Some tires are noted with decimals, while others with fractions, depending on the country of origin. This confuses a lot of people and with good reason. Why can’t they just stick to one measurement style? Well, you can have wider or narrow tires that measure the same outside diameter when mounted, but fit on different sized rims, and, as mentioned, different countries have developed different standards over the years. Generally speaking, one dimension is the inflated tire size when mounted to the rim while the other is the measurement of where the rim and tire meet. As an example, let’s look at a 26×1.95 tire common on American beach cruisers. The easiest number to decipher will read “26×1.95”. That means the tire, when properly inflated, will measure 26” in diameter by 1.95” wide. You will also see a number marked “50-559”, sometimes in parentheses. That means the tire is 50mm wide and has a Bead Seat Diameter (BSD, the actual diameter of where the tire and rim connect) of 559mm. For a more in depth explanation, check out Sheldon Brown’s Tire Sizing Systems.

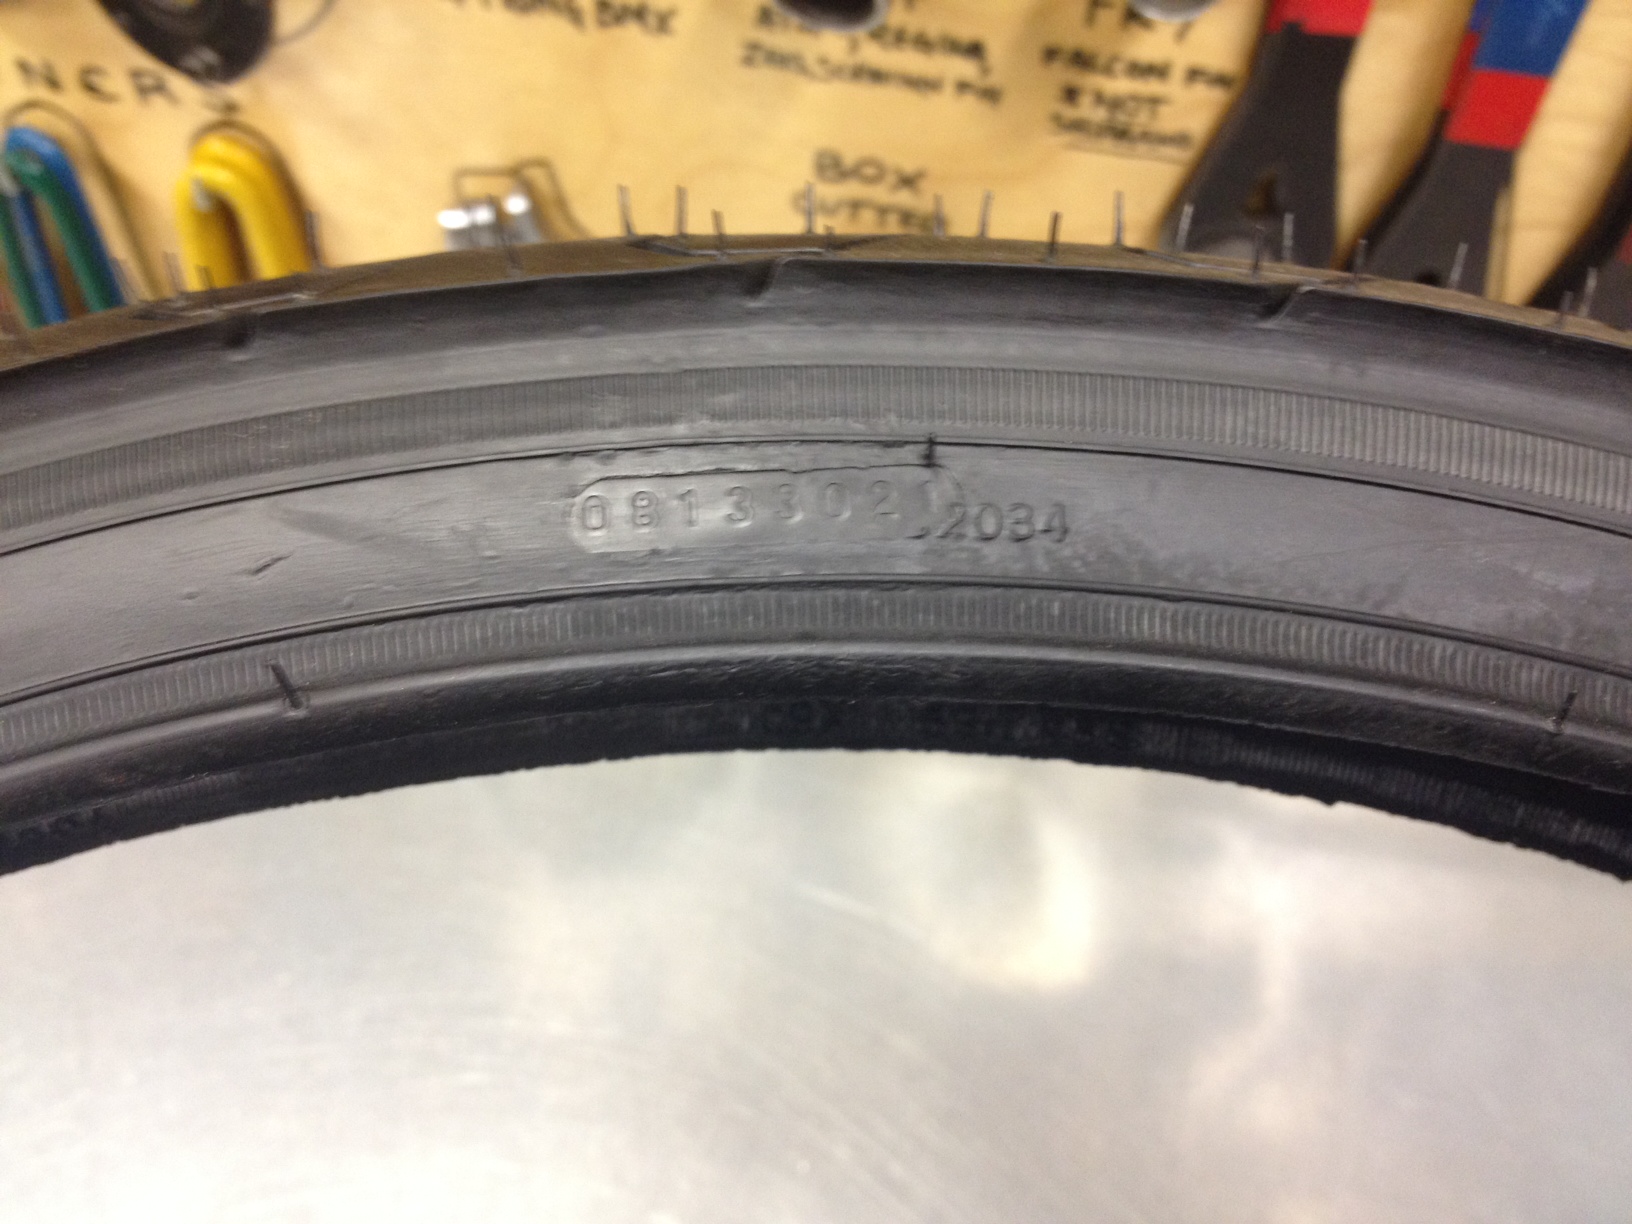
- Manufacturing numbers: The final set of numbers is used in the manufacturing and molding of the tire. It doesn’t really mean much to the consumer.


Picking the Right Tube: So, you’ve looked at the side of your tire and figured out what all those numbers mean; now, you’re ready to get the right tube. We keep over 50 different types of tubes behind the counter at the Community Cycling Center so we can ensure you get the right size. Asking for a tube using either measurement notation will get you what you need, but (continuing the above example) the 26×1.95 notation is more commonly used when discussing tube size. Remember that decimal tire sizes and fractional tire sizes are different (i.e. a 26×1 ¼ is not the same as a 26×1.25). Don’t mix them up. If in doubt, write it down or take a picture of the numbers.
Inflating your tire: Many Shop Tips ago we covered fixing a flat, but glossed over the finer points of inflating the tire. Proper tire pressure can prevent most flat tires. Tires will lose a noticeable amount of air over the course of a few weeks. Check your tire every 1-4 weeks to ensure proper pressure. Here’s a step by step guide that applies to both common valve types:
- Remove the valve cap. For a presta valve, unscrew the tip of the valve and push it down until you hear a quick hiss. Sometimes a presta valve can get stuck if it’s been closed a while.
- Firmly push the pump head on the valve and flip the lever away from the valve (this is true with most pumps, but not all). Some pumps will work with one valve type or the other, while others can handle both. Make sure you’re using the right pump for your valve.
- Reference the psi recommendation on the side of the tire and inflate to the desired pressure. You don’t always have to go to the max pressure. Too high a pressure can lead to a rough, skittish ride, while too low can feel slow and increase your chance of a flat. Experiment within the recommended range to find what’s most comfortable for you.
- Flip the lever down to unlock the pump head and carefully remove it from the valve.
- If you use presta valves, screw the valve closed. Put the valve cap back on.
There’s a lot of information to cover with tubes and tires. Hopefully this is a good introduction. If you have any questions about tubes and tires, or want help finding all those numbers on your tires, come into our bike shop and speak with one of our friendly mechanics.