Shop tip: replacing your chain
By Gwen Koon, Service Supervisor
There are many reasons that you might need to replace the chain on your bicycle. Chains wear out over time, get damaged in accidents, or may become too rusted to function. Below, you will learn how to install a new chain on your bike.
The most important thing to keep in mind as you are replacing your chain is that it will save you time and trouble later if you take good care of your new chain once it’s installed. This means keeping it properly lubricated whenever you ride. If you start to hear squeaking as you pedal, it might be time to oil your chain! Check out this blog post from Patrick to learn more about cleaning and lubing your chain.
Step One: Finding the correct type of chain.
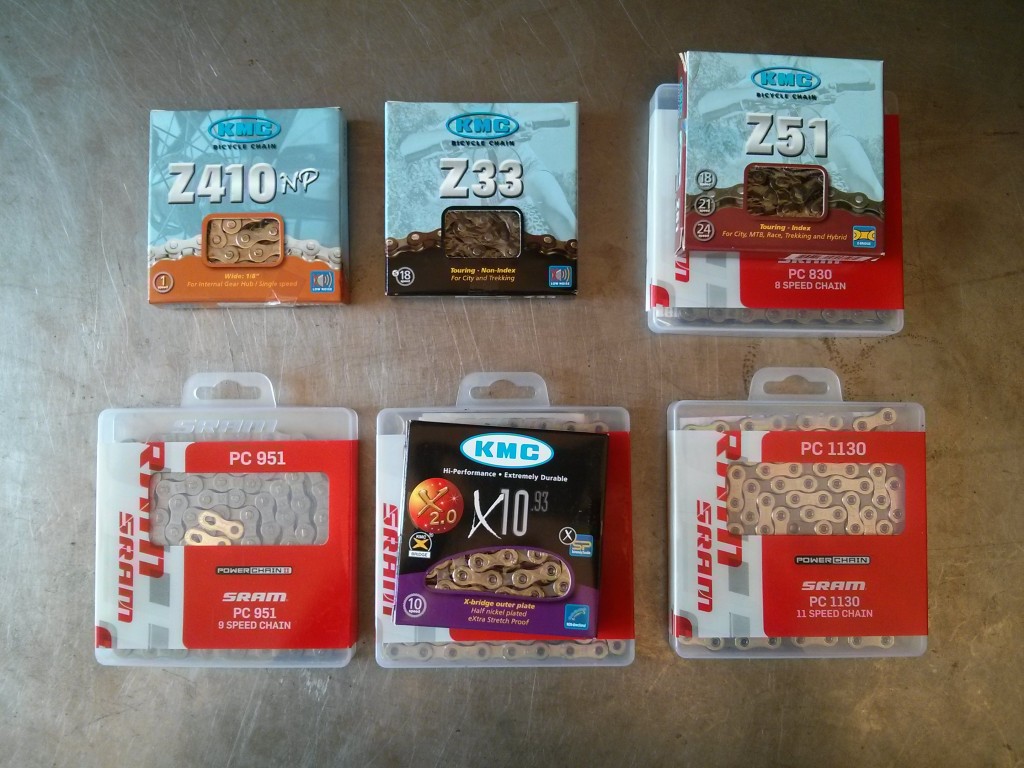
There are a few different factors that you will have to take into account when selecting a new chain for your bike. The first thing to consider is how many gears your bike has. It may be a single speed, or the freewheel/cassette on the rear wheel may be a 5, 6, 7, 8, 9, 10, or even 11-speed.
For single-speeds:
You may need either a 3/32” or 1/8” chain, depending on the type of cog that you have. Getting the wider 1/8” chain is almost always a safe route, since the wider chain will fit over the narrower cogs.
For 5, 6 or 7-speeds:
There is a type of chain designed to work with any of the three, but those chains will be for either indexed shifting or friction shifting. If your shifters click into place when you change gears, you have indexed shifting. If they slide into place without a click, then you have friction shifting. A friction-only chain will not work as well with indexed shifting, but a chain designed for indexed shifting will work fine for either.
For 8-speeds:
You will want an 8-speed chain. 8-speed chains are the same dimension (3/32”) as 5,6 and 7-speed chains, but they are longer, which helps them work with the wider gear ranges that 8-speeds allow for. (We will address sizing your chain below.)
For 9-speeds:
You will need a 9-speed chain. The same is true of 10-speeds and 11-speeds. None of these are compatible with any other type of chain.
The only time when the brand of chain will make a significant difference is if you have a Campagnolo cassette on your rear wheel. If you do, then you will need a Campagnolo chain as well.
Step Two: Remove the old chain
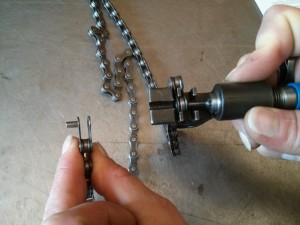 Using a chain-breaker, remove one pin from one link of your old chain. If you intend to re-install that chain (and it is one which can be reinstalled using the same rivet), be sure that you do not let the pin come all the way out of the outer link. Grabbing your old chain by the end with the pin attached to it, pull the chain through your drive train in order to remove it from your drive train. If you have a rag available to place the old chain on, you might save yourself a lot of clean-up time at the end of your project. Chains can be pretty greasy.
Step Three: Sizing your chain
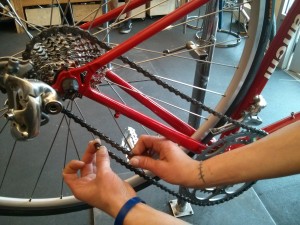 The easiest way to size a chain is to lay it over the largest gear in the front and the largest gear in the back (bypassing the rear derailleur) at the same time. Count the number of links which are not necessary for both ends of the chain to meet, and then add one link.
Another good way to size a chain is to run the chain through both derailleurs (see below) and lay it on the smallest cog in the front and the smallest gear in the back. If the chain is not taut when you bring both ends of the chain together in this position, hold the chain so that enough links overlap that the chain becomes taut. If both tests yield different results, erring on the side of removing more links is usually safer.
Step Four: Routing
It is easiest to route a chain through derailleurs when the bike is right-side-up, since this allows you to work with gravity instead of against it. I would recommend that routing be attempted with the bike upright, resting against a wall if no stand is available to raise it off the ground.
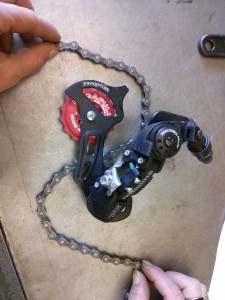 The first step is to drop one end of the chain (for re-useable rivet chains, the end without the rivet) into the top of the derailleur cage between the upper pulley wheel and the gears on the rear wheel. Hold on to the top half of the chain (you can use a twist-tie to secure it to your frame) while you loop the other end of the chain around the bottom of the upper pulley-wheel and over the top of the lower pulley-wheel.
Once the chain has been threaded through the rear derailleur (as outlined above) you can let that half of the chain go and route the top half of the chain through the front derailleur and around the chainrings (the gears on the front of your bike). You may have to pull the chain off of the chainrings to allow yourself enough slack to reconnect the two ends of the chain.
Step Five: Connecting the new chain (by brand)
For Shimano chains:
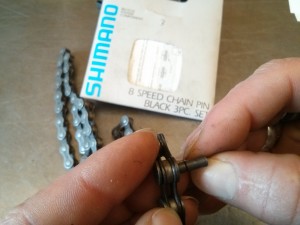 There is a special rivet which you have to use to connect the links to one another. These rivets have an attached guide which assists with installation. They are intended to be installed with a regular chain-breaker (see below): set the narrower “guide” portion of the pin into the links to lead the pin in. Once the pin has been installed, you can use either a chain-breaker or pliers to remove the guide. These chain pins come with every new Shimano chain, and are available for purchase separately.
For SRAM and other “master-link” chains:
SRAM chains have “Power Links” (for 8 and 9-speed) or “Powerlocks” (for 10 and 11-speed) and other manufacturers have similarly proprietary master links. This means that all master-link type chains required a specific link. These links are easy to install; they are meant to be snapped into place by hand, but are best removed with a special tool called a “chain link pliers”. Though sometimes difficult to secure, it is important that these links snap completely into place on either end to ensure a solid connection. Not all master links are re-usable, so be sure to read the instructions.
For all re-useable rivet chains:
Rivet chains are the type of chains for which a chain tool is used to both remove and install the rivet. A chain breaker must be used to press the rivet into the chain link for installation: set the two sides of the chain link into the cradle (the one into which it fits most securely, if there are multiple holsters) and use the chain-breaker’s pin to press the rivet into both sides of the link.
Once the rivet is secured, check to ensure the link pivots freely. If not, you will have to loosen up the link. Some chain breakers have a second u-shaped cradle which is set farther out from any backing and can be used to loosen up newly connected links. To use this cradle, place the link in the cradle in the opposite orientation (from the way the link was positioned when you installed the rivet); then press the chain-breaker’s pin up against the newly installed rivet and turn the tool’s handle ¼ of a rotation. Without any backing behind the link, the link will be expanded as the chain pin presses against the rivet. In the absence of a second chain-breaker cradle, pushing the rivet back and forth and wiggling the chain link back and forth will usually have a similar result.
Exceptions:
Do exist! Be sure to read the manufacturer’s instructions before installing any component.
Resources:
Shimano chain installation guide
Park Tool’s chain installation guide